


مشخصات مقاله
-
759
-
0.0
-
2323
-
0
-
0
آموزش طراحی افکت Image Overlay Slide برای تصاویر
آموزش افکت Image Overlay Slide
در این مقاله می آموزید که چطور با استفاده از CSS و Html Html افکت های همپوشانی بصورت اسلایدی بر روی یک تصویر ایجاد کنید.
Image Overlay Slide
در این مقاله می آموزید که چطور افکت اسلایدی همپوشانی تصویر در هاور ( hover) ایجاد کنید:
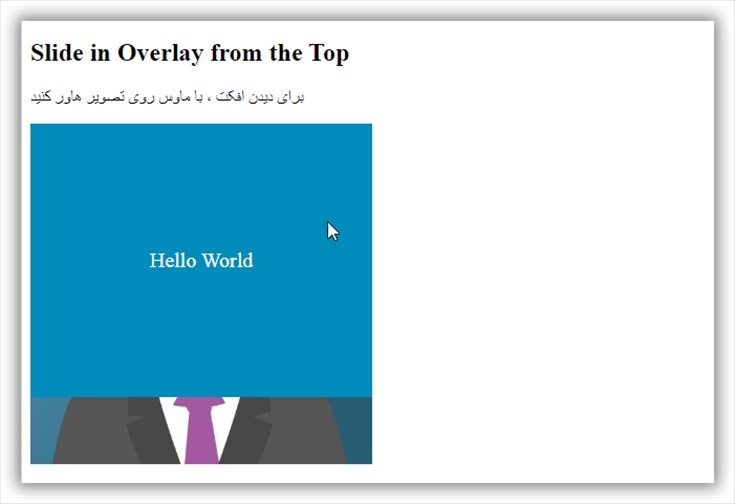
1. Slide in Overlay from the Top
قدم اول : کد HTML را اضافه کنید.
مثال :
Slide in Overlay from the Top
برای دیدن افکت ، با ماوس روی تصویر هاور کنید
![Avatar]()

قدم دوم : کد CSS را اضافه کنید.
مثال :
.container {
  position: relative;
  width: 50%;
}

.image {
  display: block;
  width: 100%;
  height: auto;
}

.overlay {
  position: absolute;
  bottom: 100%;
  left: 0;
  right: 0;
  background-color: #008CBA;
  overflow: hidden;
  width: 100%;
  height:0;
  transition: .5s ease;
}

.container:hover .overlay {
  bottom: 0;
  height: 100%;
}

.text {
  color: white;
  font-size: 20px;
  position: absolute;
  top: 50%;
  left: 50%;
  -webkit-transform: translate(-50%, -50%);
  -ms-transform: translate(-50%, -50%);
  transform: translate(-50%, -50%);
  text-align: center;
}
نمونه مثال Slide in Overlay from the Top:
<h2>Slide in Overlay from the Top</h2>
<p>برای دیدن افکت ، با ماوس روی تصویر هاور کنید</p><div class="container">
<img src="http://articles.tahlildadeh.com/image.axd?picture=img_avatar.png" alt="Avatar" class="image">
<div class="overlay">
<div class="text">Hello World</div>
</div>
</div>
Slide in Overlay from the Top خروجی
2. Slide in Overlay from the Bottom
قدم اول : کد HTML را اضافه کنید.
مثال :
Slide in Overlay from the Bottom
Hover over the image to see the effect.
![Avatar]()

قدم دوم : کد CSS را اضافه کنید.
مثال :
                .container {
  position: relative;
  width: 50%;
}

.image {
  display: block;
  width: 100%;
  height: auto;
}

.overlay {
  position: absolute;
  bottom: 0;
  left: 0;
  right: 0;
  background-color: #008CBA;
  overflow: hidden;
  width: 100%;
  height: 0;
  transition: .5s ease;
}

.container:hover .overlay {
  height: 100%;
}

.text {
  color: white;
  font-size: 20px;
  position: absolute;
  top: 50%;
  left: 50%;
  -webkit-transform: translate(-50%, -50%);
  -ms-transform: translate(-50%, -50%);
  transform: translate(-50%, -50%);
  text-align: center;
}
نمونه مثال Slide in Overlay from the Bottom:
<h2>Slide in Overlay from the Bottom</h2>
<p>برای دیدن افکت ، با ماوس روی تصویر هاور کنید</p><div class="container">
<img src="http://articles.tahlildadeh.com/image.axd?picture=img_avatar.png" alt="Avatar" class="image">
<div class="overlay">
<div class="text">Hello World</div>
</div>
</div>
خروجی Slide in Overlay from the Bottom

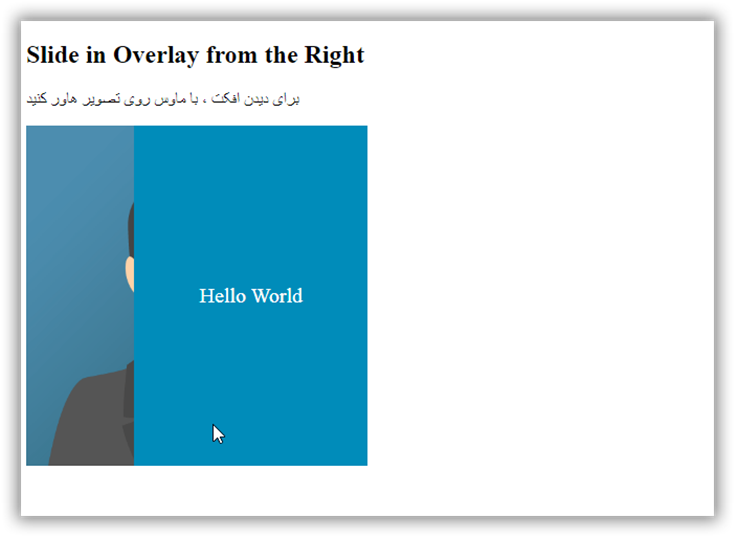
3. Slide in Overlay from the Right
قدم اول : کد HTML را اضافه کنید.
مثال :
Slide in Overlay from the Right
برای دیدن افکت ، با ماوس روی تصویر هاور کنید
![Avatar]()

قدم دوم : کد CSS را اضافه کنید.
مثال :
 .container {
  position: relative;
  width: 50%;
}

.image {
  display: block;
  width: 100%;
  height: auto;
}

.overlay {
  position: absolute;
  bottom: 0;
  left: 100%;
  right: 0;
  background-color: #008CBA;
  overflow: hidden;
  width: 0;
  height: 100%;
  transition: .5s ease;
}

.container:hover .overlay {
  width: 100%;
  left: 0;
}

.text {
  color: white;
  font-size: 20px;
  position: absolute;
  top: 50%;
  left: 50%;
  -webkit-transform: translate(-50%, -50%);
  -ms-transform: translate(-50%, -50%);
  transform: translate(-50%, -50%);
  white-space: nowrap;
}
نمونه مثال Slide in Overlay from the Right:
<h2>Slide in Overlay from the Right</h2>
<p>برای دیدن افکت ، با ماوس روی تصویر هاور کنید</p><div class="container">
<img src="http://articles.tahlildadeh.com/image.axd?picture=img_avatar.png" alt="Avatar" class="image">
<div class="overlay">
<div class="text">Hello World</div>
</div>
</div>
خروجی Slide in Overlay from the Right
4. Slide in Overlay from the Left
قدم اول : کد HTML را اضافه کنید.
مثال :
Slide in Overlay from the Left
برای دیدن افکت ، با ماوس روی تصویر هاور کنید
![Avatar]()
قدم دوم : کد CSS را اضافه کنید.
مثال :
.container {
  position: relative;
  width: 50%;
}

.image {
  display: block;
  width: 100%;
  height: auto;
}

.overlay {
  position: absolute;
  bottom: 0;
  left: 0;
  right: 0;
  background-color: #008CBA;
  overflow: hidden;
  width: 0;
  height: 100%;
  transition: .5s ease;
}

.container:hover .overlay {
  width: 100%;
}

.text {
  color: white;
  font-size: 20px;
  position: absolute;
  top: 50%;
  left: 50%;
  -webkit-transform: translate(-50%, -50%);
  -ms-transform: translate(-50%, -50%);
  transform: translate(-50%, -50%);
  white-space: nowrap;
}
نمونه مثال Slide in Overlay from the Left:
<h2>Slide in Overlay from the Left</h2>
<p>برای دیدن افکت ، با ماوس روی تصویر هاور کنید</p><div class="container">
<img src="http://articles.tahlildadeh.com/image.axd?picture=img_avatar.png" alt="Avatar" class="image">
<div class="overlay">
<div class="text">Hello World</div>
</div>
</div>
خروجی Slide in Overlay from the Left
