مشخصات مقاله
-
418
-
0.0
-
1585
-
0
-
0
آموزش Form Text Field-Java Spring
Form text Field
MVC Form Text Field (تگ متن در ام وی سی) در اسپرینگ
MVC Form Text Field (تگ متن در ام وی سی) اسپرینگ، با استفاده از مقدار مرزی (bound value)، یک تگ ورودی HTML ایجاد می کند. به طور پیش فرض، نوع تگ ورودی، متن است.
نحو
1 2 | < form:input path="name" /><button></button> |
در اینجا، ویژگی مسیر(path attribute)، form field را به خصیصه bean متصل می کند. همچنین کتابخانه MVC Form Tag (تگ متن در ام وی سی) در اسپرینگ، سایر انواع ورودی از جمله ایمیل، تاریخ(date)، تلفن(tel) و غیره را نیز ارائه می کند.
برای ایمیل:
1 2 | < form:input type=?email? path="email" /><button></button> |
برای تاریخ:
1 2 | < form:input type=?date? path="date" /><button></button> |
مثال MVC Form Text Field (تگ متن در ام وی سی) در اسپرینگ
مثالی برای ایجاد یک فرم رزرو قطار با استفاده از کتابخانه form tag را با هم می بینیم.
1- وابستگی ها را به فایلpom.xml اضافه کنید.
1 2 3 4 5 6 7 8 9 10 11 12 13 14 15 16 17 18 19 20 21 22 23 24 25 26 27 | < dependency> < groupId>org.springframework< /groupId> < artifactId>spring-webmvc< /artifactId> < version>5.1.1.RELEASE< /version> < /dependency> < dependency> < groupId>javax.servlet< /groupId> < artifactId>servlet-api< /artifactId> < version>3.0-alpha-1< /version> < /dependency> < dependency> < groupId>javax.servlet< /groupId> < artifactId>jstl< /artifactId> < version>1.2< /version> < /dependency> < dependency> < groupId>org.apache.tomcat< /groupId> < artifactId>tomcat-jasper< /artifactId> < version>9.0.12< /version> < /dependency> <button></button> |
2- کلاس bean را ایجاد کنید : در اینجا کلاس bean شامل متغیر های (در کنار متدهای setter و getter) متناظر با فیلدهای ورودی موجود در فرم است.
Reservation.java
1 2 3 4 5 6 7 8 9 10 11 12 13 14 15 16 17 18 19 20 21 22 23 24 | package com.javatpoint; public class Reservation { private String firstName; private String lastName; public Reservation() { } public String getFirstName() { return firstName; } public void setFirstName(String firstName) { this.firstName = firstName; } public String getLastName() { return lastName; } public void setLastName(String lastName) { this.lastName = lastName; } } <button></button> |
3- کلاس کنترلر را ایجاد کنید.
ReservationController.java
1 2 3 4 5 6 7 8 9 10 11 12 13 14 15 16 17 18 19 20 21 22 23 24 25 26 | package com.javatpoint; import org.springframework.stereotype.Controller; import org.springframework.ui.Model; import org.springframework.web.bind.annotation.ModelAttribute; import org.springframework.web.bind.annotation.RequestMapping; @RequestMapping("/reservation") @Controller public class ReservationController { @RequestMapping("/bookingForm") public String bookingForm(Model model) { //create a reservation object Reservation res=new Reservation(); //provide reservation object to the model model.addAttribute("reservation", res); return "reservation-page"; } @RequestMapping("/submitForm") // @ModelAttribute binds form data to the object public String submitForm(@ModelAttribute("reservation") Reservation res) { return "confirmation-form"; } } <button></button> |
4- ورودی کنترلر را در فایل web.xml ارائه دهید.
web.xml
1 2 3 4 5 6 7 8 9 10 11 12 13 14 15 | < ?xml version="1.0" encoding="UTF-8" ?> < web-app xmlns:xsi="http://www.w3.org/2001/XMLSchema-instance" xmlns="http://java.sun.com/xml/ns/javaee" xsi:schemaLocation="http://java.sun.com/xml/ns/javaee http://java.sun.com/xml/ns/javaee/web-app_3_0.xsd" id="WebApp_ID" version="3.0"> < display-name>SpringMVC< /display-name> < servlet> < servlet-name>spring< /servlet-name> < servlet-class>org.springframework.web.servlet.DispatcherServlet< /servlet-class> < load-on-startup>1< /load-on-startup> < /servlet> < servlet-mapping> < servlet-name>spring< /servlet-name> < url-pattern>/< /url-pattern> < /servlet-mapping> < /web-app> <button></button> |
5- Bean را در فایلxml تعریف کنید.
spring-servlet.xml
1 2 3 4 5 6 7 8 9 10 11 12 13 14 15 16 17 18 19 20 21 22 23 24 25 26 | < ?xml version="1.0" encoding="UTF-8" ?> 6. xsi:schemaLocation=" < !-- Provide support for component scanning --> < context:component-scan base-package="com.javatpoint" /> < !--Provide support for conversion, formatting and validation --> < mvc:annotation-driven /> < !-- Define Spring MVC view resolver --> < bean id="viewResolver" class="org.springframework.web.servlet.view.InternalResourceViewResolver"> < property name="prefix" value="/WEB-INF/jsp/">< /property> < property name="suffix" value=".jsp">< /property> < /bean> < /beans> <button></button> |
6- صفحه درخواست شده را ایجاد کنید.
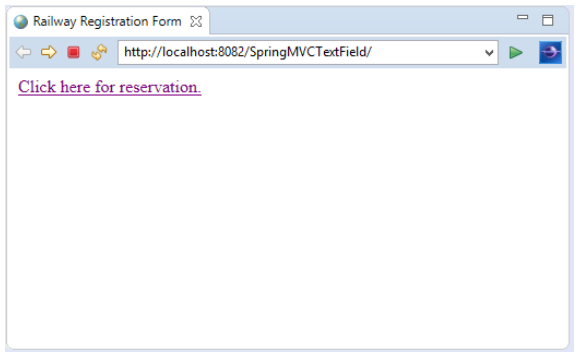
index.jsp
1 2 3 4 5 6 7 8 9 10 11 | < !DOCTYPE html> < html> < head> < title>Railway Registration Form< /title> < /head> < body> < a href="reservation/bookingForm">Click here for reservation.< /a> < /body> < /html> <button></button> |
7- سایر اجزای منظر را ایجاد کنید.
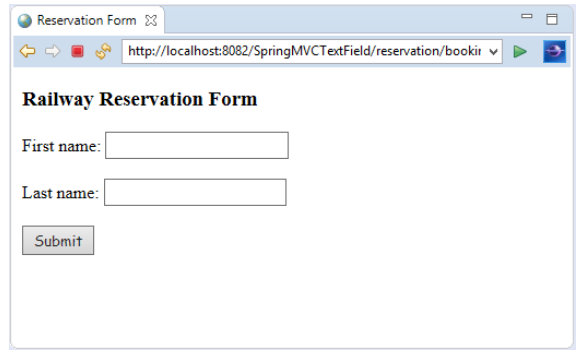
reservation-page.jsp
1 2 3 4 5 6 7 8 9 10 11 12 13 14 15 16 17 18 19 20 21 22 23 24 | <%@ taglib prefix="form" uri="http://www.springframework.org/tags/form" %> < !DOCTYPE html> < html> < head> < title>Reservation Form< /title> < /head> < h3>Railway Reservation Form< /h3> < body> < form:form action="submitForm" modelAttribute="reservation"> First name: < form:input path="firstName" /> < br>< br> Last name: < form:input path="lastName" /> < br>< br> < input type="submit" value="Submit" /> < /form:form> < /body> < /html> <button></button> |
نکته: مقدار پاس داده شده با نماد @ModelAttribute، باید با مقدار modelAttribute حاظر در صفحه منظر یکسان باشد.
confirmation-page.jsp
1 2 3 4 5 6 7 8 9 10 11 | < !DOCTYPE html> < html> < body> < p>Your reservation is confirmed successfully. Please, re-check the details.< /p> First Name : ${reservation.firstName} < br>Last Name : ${reservation.lastName} < /body> < /html> <button></button> |
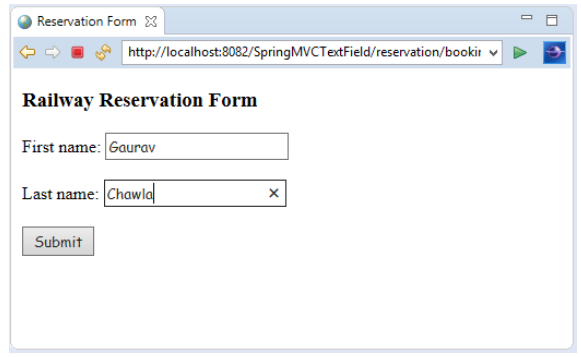
خروجی :


