مشخصات مقاله
-
1688
-
0.0
-
6092
-
0
-
0
آموزش سویچر تصویر اندروید

آموزش سویچر تصویر اندروید
گاهی اوقات نمی خواهید که تصویری به طور ناگهانی روی صفحه ظاهر شود، بلکه ترجیح می دهید به جای تصویری که تغییر می کند، انیمیشن به کار ببرید. این عمل در اندروید با ImageSwitcher پشتیبانی می شود.
سویچر تصویر به شما اجازه می دهد تا روی طریقه ی ظاهر شدن تصاویر در صفحه، تغییراتی اعمال کنید. برای استفاده از سویچر تصویر، ابتدا باید مولفه xml آن را تعریف کنید که ترکیب آن را در زیر مشاهده می کنید.
1 2 3 4 5 | Its syntax is given below:<imageswitcher ="" android:id="@+id/imageSwitcher1" android:layout_width="wrap_content" android:layout_height="wrap_content" android:layout_centerhorizontal="true" android:layout_centervertical="true"> </imageswitcher><button></button> |
اکنون ما در فایل جاوا یک نمونه ImageSwithcer ایجاد کرده ایم و یک مرجع از مولفه ی XML آن به دست می آوریم. ترکیب آن را در زیر مشاهده می کنید.
1 2 3 | private ImageSwitcher imageSwitcher;imageSwitcher = (ImageSwitcher)findViewById(R.id.imageSwitcher1); <button></button> |
کار دیگری که انجام می دهید اجرای اینترفیس ViewFactory و اجرای روش اجرا نشده ای می باشد که یک imageView را گزارش می دهد. ترکیب آن مانند زیر است.
1 2 3 4 5 6 7 8 | imageSwitcher.setImageResource(R.drawable.ic_launcher); imageSwitcher.setFactory(new ViewFactory() { public View makeView() { ImageView myView = new ImageView(getApplicationContext()); return myView; }} <button></button> |
و در انتها لازم است که Animation را به ImageSwithcer اضافه کنید. باید آبجکتی از گروه Animation را از طریق گروه AnimationUtilities و با فراخوانی روش استاتیک loadAnimation تعریف کنید، که ترکیب آن را در زیر مشاهده می کنید.
1 2 3 4 | Animation in = AnimationUtils.loadAnimation(this,android.R.anim.slide_in_left);imageSwitcher.setInAnimation(in);imageSwitcher.setOutAnimation(out); <button></button> |
روش setInAnimaton ظهور انیمیشن آبجکت روی صفحه را تنظیم می کند، در حالیکه setOutAnimation عمل عکس آن را انجام می دهد. روش loadAnimation() یک آبجکت انیمیشن ایجاد می کند.
علاوه بر این روش ها، روش های تعریف شده ی دیگری در ImageSwitcher وجود دارند که در جدول زیر مشاهده می کنید:
مثال: مثال زیر برخی تاثیرات image switcher را روی bitmap توضیح می دهد. این مثال برنامه ی پایه ای ایجاد می کند که به شما اجازه می دهد تا تاثیرات انیمیشن را روی تصاویر ببینید.
برای انجام این مثال لازم است آن را روی یک دستگاه واقعی اجرا کنید.
در زیر محتوای تغییریافته ی فایل فعالیت اصلی را مشاهده می کنید.
1 2 3 4 5 6 7 8 9 10 11 12 13 14 15 16 17 18 19 20 21 22 23 24 25 26 27 28 29 30 31 32 33 34 35 36 37 38 39 40 41 42 43 44 45 46 47 48 49 50 51 52 53 54 55 56 57 58 59 60 61 62 63 64 | src/com.example.imageswithcer/MainActivity.java. package com.example.imageswitcher; import android.app.ActionBar.LayoutParams; import android.app.Activity; import android.os.Bundle; import android.view.Menu; import android.view.View; import android.view.animation.Animation; import android.view.animation.AnimationUtils; import android.widget.ImageButton; import android.widget.ImageSwitcher; import android.widget.ImageView; import android.widget.Toast; import android.widget.ViewSwitcher.ViewFactory;public class MainActivity extends Activity { private ImageButton img; private ImageSwitcher imageSwitcher; @Override protected void onCreate(Bundle savedInstanceState) { super.onCreate(savedInstanceState); setContentView(R.layout.activity_main); img = (ImageButton)findViewById(R.id.imageButton1); imageSwitcher = (ImageSwitcher)findViewById(R.id.imageSwitcher1); imageSwitcher.setFactory(new ViewFactory() { @Override public View makeView() { ImageView myView = new ImageView(getApplicationContext()); myView.setScaleType(ImageView.ScaleType.FIT_CENTER); myView.setLayoutParams(new ImageSwitcher.LayoutParams(LayoutParams. FILL_PARENT,LayoutParams.FILL_PARENT)); return myView; } }); } public void next(View view){ Toast.makeText(getApplicationContext(), "Next Image", Toast.LENGTH_LONG).show(); Animation in = AnimationUtils.loadAnimation(this, android.R.anim.slide_in_left); Animation out = AnimationUtils.loadAnimation(this, android.R.anim.slide_out_right); imageSwitcher.setInAnimation(in); imageSwitcher.setOutAnimation(out); imageSwitcher.setImageResource(R.drawable.ic_launcher); } public void previous(View view){ Toast.makeText(getApplicationContext(), "previous Image", Toast.LENGTH_LONG).show(); Animation in = AnimationUtils.loadAnimation(this, android.R.anim.slide_out_right); Animation out = AnimationUtils.loadAnimation(this, android.R.anim.slide_in_left); imageSwitcher.setInAnimation(out); imageSwitcher.setOutAnimation(in); imageSwitcher.setImageResource(R.drawable.ic_launcher); } @Override public boolean onCreateOptionsMenu(Menu menu) { // Inflate the menu; this adds items to the action bar if it is present. getMenuInflater().inflate(R.menu.main, menu); return true; } } <button></button> |
در زیر محتوای تغییریافته ی xml فایل res/layout/activity_main.xml را مشاهده می کنید.
1 2 3 4 5 6 7 8 9 10 11 12 | <relativelayout xmlns:android="http://schemas.android.com/apk/res/android" ="" xmlns:tools="http://schemas.android.com/tools" android:layout_width="match_parent" android:layout_height="match_parent" android:paddingbottom="@dimen/activity_vertical_margin" android:paddingleft="@dimen/activity_horizontal_margin" android:paddingright="@dimen/activity_horizontal_margin" android:paddingtop="@dimen/activity_vertical_margin" tools:context=".MainActivity"> <imagebutton ="" android:id="@+id/imageButton1" android:layout_width="wrap_content" android:layout_height="wrap_content" android:layout_alignparenttop="true" android:layout_centerhorizontal="true" android:layout_margintop="54dp" android:onclick="next" android:src="@android:drawable/ic_menu_send"></imagebutton> <imageswitcher ="" android:id="@+id/imageSwitcher1" android:layout_width="wrap_content" android:layout_height="wrap_content" android:layout_centerhorizontal="true" android:layout_centervertical="true"> <imagebutton ="" android:id="@+id/imageButton2" android:layout_width="wrap_content" android:layout_height="wrap_content" android:layout_alignparentbottom="true" android:layout_centerhorizontal="true" android:layout_marginbottom="85dp" android:onclick="previous" android:src="@android:drawable/ic_menu_revert"></imagebutton> </imageswitcher></relativelayout> <button></button> |
در زیر محتوای فایل AndroidManifest.xml را مشاهده ی کنید.
1 2 3 4 5 6 7 8 9 10 11 12 13 14 15 16 17 18 19 20 | <!--?xml version="1.0" encoding="utf-8" ?--><manifest xmlns:android="http://schemas.android.com/apk/res/android" ="" package="com.example.imageswitcher" android:versioncode="1" android:versionname="1.0"> <uses-sdk ="" android:minsdkversion="8" android:targetsdkversion="17"></uses-sdk> <application ="" android:allowbackup="true" android:icon="@drawable/ic_launcher" android:label="@string/app_name" android:theme="@style/AppTheme"> <activity ="" android:name="com.example.imageswitcher.MainActivity" android:label="@string/app_name"> <intent-filter> <action android:name="android.intent.action.MAIN" =""></action> <category android:name="android.intent.category.LAUNCHER"></category> </intent-filter> </activity></application></manifest> <button></button> |
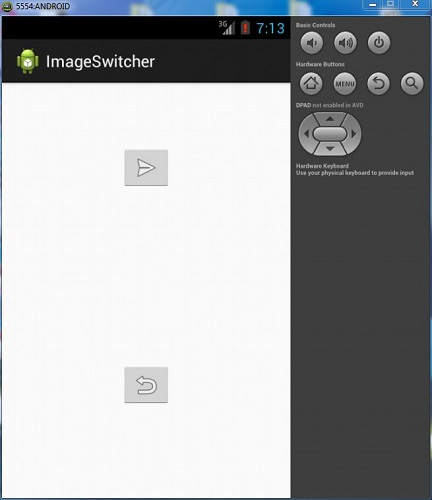
اجازه بدهید Image Switcher را اجرا کنیم. فرض می کنیم که در هنگام انجام تنظیمات محیط، AVD خود را ایجاد کرده اید. برای اجرای برنامه از eclipse، یکی از فایل های فعالیت پروژه را باز کنید و روی آیکن Run از تولبار کلیک کنید. Eclipse برنامه را روی AVD شما نصب و آغازمی کند و اگر همه چیز در مورد برنامه و تنظیمات درست باشد، پنجره ی Emulator زیر نمایش داده خواهد شد.

اکنون اگر به صفحه ی دستگاه خود نگاه کنید، دو دکمه خواهید دید.
اکنون دکمه ی بالایی با فلش به سمت راست انتخاب کنید. یک تصویر از سمت راست ظاهر می شود که به سمت چپ حرکت می کند، که در تصویر زیر مشاهده می کنید.
اکنون روی دکمه ی پایینی ضربه بزنید که تصویر قبل را با کمی تغییر برمی گرداند، که در تصویر زیر می توانید ببینید.
