مشخصات مقاله
-
2215
-
0.0
-
3879
-
0
-
1
آموزش انیمیشن Animation سازی در اندروید

آموزش انیمیشن Animation سازی در اندروید
انیمیشن در اندروید از راه های بسیاری امکان پذیر می باشد. در این فصل ما در مورد یک راه آسان و به کرات استفاده شده در ساخت انیمیشن بحث خواهیم کرد که انیمیشن tweened نامیده می شود.
انیمیشن Tween
انیمیشن Tween پارامترهایی مانند شروع، پایان، اندازه، مدت زمان، زاویه ی چرخش و غیره را می گیرد و انیمیشن مورد نیاز روی آبجکت را اجرا می کند، که می تواند برای هر نوع آبجکتی به کار گرفته شود. بنابراین برای استفاده از این برنامه، اندروید به ما گروهی به نام Animation ارائه می دهد.
برای اجرای انیمیشن در اندروید، قصد داریم عملکرد استاتیک loadAnimation() از گروه AnimationUtils را فرابخوانیم. هدف این است که نتیجه را در یک آبجکت انیمیشن دریافت کنیم. ترکیب آن مانند زیر می باشد .
1 2 3 | Animation animation = AnimationUtils.loadAnimation(getApplicationContext()، R.anim.myanimation); <button></button> |
به دومین پارامتر توجه کنید که نام فایل xml انیمیشن ما می باشد. شما باید یک فولدر جدید به نام anim تحت مسیر res ایجاد کنید و یک فایل xml تحت فولدر anim بسازید.
این گروه انیمیشن عملکردهای سودمند بسیاری دارد که در زیر لیست شده اند.
برای به کار بردن این انیمیشن در آبجکت، تنها روش startAnimation() را از آبجکت فرا خواهیم خواند. ترکیب آن مانند زیر می باشد:
1 2 3 | ImageView image1 = (ImageView)findViewById(R.id.imageView1);image.startAnimation(animation); <button></button> |
انیمیشن Zoom in
برای اجرای انیمیشن zoom in، یک فایل XML تحت فولدر anim و تحت مسیر res ایجاد کنید و کد زیر را در فایل قرار دهید.
1 2 3 4 5 | <scale xmlns:android="http://schemas.android.com/apk/res/android" ="" android:fromxscale="0.5" android:toxscale="3.0" android:fromyscale="0.5" android:toyscale="3.0" android:duration="5000" android:pivotx="50%" android:pivoty="50%"> </scale></set> <button></button> |
پارامترهای fromXScale و fromYScaleنقطه ی شروع و پارامترهای toXScale و toYScaleنقطه ی پایان را تعریف می کنند. Duration زمان انیمیشن را تعریف می کند و pivotX،pivotY مرکزی را که انیمیشن از آن شروه می شود تعریف می کند.
مثال زیر استفاده از انیمیشن را در اندروید توضیح می دهد. شما قادر هستید انواع مختلف انیمیشن را از منو انتخاب کنید و انیمیشن انتخاب شده روی یک imageView روی صفحه به کار گرفته خواهد شد.
برای آزمایش با این مثال لازم است که آن را روی یک مقلد یا یک دستگاه واقعی اجرا کنید.
در اینجا کد تغییر یافته ی src/com.example.animation/MainActivity.java را مشاهده می کنید.
1 2 3 4 5 6 7 8 9 10 11 12 13 14 15 16 17 18 19 20 21 22 23 24 25 26 27 28 29 30 31 32 33 34 35 36 37 38 39 40 41 42 43 44 45 46 | package com.example.animation;import com.example.animation.R;import android.os.Bundle;import android.app.Activity;import android.view.Menu;import android.view.MenuItem;import android.view.animation.Animation;import android.view.animation.AnimationUtils;import android.widget.ImageView;public class MainActivity extends Activity { @Override protected void onCreate(Bundle savedInstanceState) { super.onCreate(savedInstanceState); setContentView(R.layout.activity_main); } @Override public boolean onCreateOptionsMenu(Menu menu) { // Inflate the menu; this adds items to the action bar if it is present. getMenuInflater().inflate(R.menu.main، menu); return true; } public boolean onOptionsItemSelected(MenuItem item) { super.onOptionsItemSelected(item); switch(item.getItemId()) { case R.id.zoomInOut: ImageView image = (ImageView)findViewById(R.id.imageView1); Animation animation = AnimationUtils.loadAnimation(getApplicationContext()، R.anim.myanimation); image.startAnimation(animation); return true; case R.id.rotate360: ImageView image1 = (ImageView)findViewById(R.id.imageView1); Animation animation1 = AnimationUtils.loadAnimation(getApplicationContext()، R.anim.clockwise); image1.startAnimation(animation1); return true; case R.id.fadeInOut: ImageView image2 = (ImageView)findViewById(R.id.imageView1); Animation animation2 = AnimationUtils.loadAnimation(getApplicationContext()، R.anim.fade); image2.startAnimation(animation2); return true; } return false; }} <button></button> |
در اینجا کد تغییر یافته ی res/layout/activity_main.xml را مشاهده می کنید.
1 2 3 4 | <relativelayout xmlns:android="http://schemas.android.com/apk/res/android" ="" xmlns:tools="http://schemas.android.com/tools" android:layout_width="match_parent" android:layout_height="match_parent" android:gravity="top" android:paddingbottom="@dimen/activity_vertical_margin" android:paddingleft="@dimen/activity_horizontal_margin" android:paddingright="@dimen/activity_horizontal_margin" android:paddingtop="@dimen/activity_vertical_margin" tools:context=".MainActivity"> <imageview ="" android:id="@+id/imageView1" android:layout_width="wrap_content" android:layout_height="wrap_content" android:layout_alignparenttop="true" android:layout_centerhorizontal="true" android:layout_margintop="179dp" android:src="@drawable/ic_launcher"></imageview></relativelayout> <button></button> |
در اینجا کد res/anim/myanimation.xml را مشاهده می کنید.
1 2 3 4 5 6 7 8 | <!--?xml version="1.0" encoding="utf-8" ?--> <scale xmlns:android="http://schemas.android.com/apk/res/android" ="" android:fromxscale="0.5" android:toxscale="3.0" android:fromyscale="0.5" android:toyscale="3.0" android:duration="5000" android:pivotx="50%" android:pivoty="50%"> </scale> <scale xmlns:android="http://schemas.android.com/apk/res/android" ="" android:startoffset="5000" android:fromxscale="3.0" android:toxscale="0.5" android:fromyscale="3.0" android:toyscale="0.5" android:duration="5000" android:pivotx="50%" android:pivoty="50%"> </scale></set> <button></button> |
در اینجا کد res/anim/clockwise.xml را مشاهده می کنید.
1 2 3 4 5 6 7 8 | <!--?xml version="1.0" encoding="utf-8" ?--> <rotate xmlns:android="http://schemas.android.com/apk/res/android" ="" android:fromdegrees="0" android:todegrees="360" android:pivotx="50%" android:pivoty="50%" android:duration="5000"> </rotate> <rotate xmlns:android="http://schemas.android.com/apk/res/android" ="" android:startoffset="5000" android:fromdegrees="360" android:todegrees="0" android:pivotx="50%" android:pivoty="50%" android:duration="5000"> </rotate></set> <button></button> |
در اینجا کد res/anim/fade.xml را مشاهده می کنید.
1 2 3 4 5 6 7 8 | <!--?xml version="1.0" encoding="utf-8" ?--><set xmlns:android="http://schemas.android.com/apk/res/android" ="" android:interpolator="@android:anim/accelerate_interpolator"> <alpha ="" android:fromalpha="0" android:toalpha="1" android:duration="2000"> </alpha> <alpha ="" android:startoffset="2000" android:fromalpha="1" android:toalpha="0" android:duration="2000"> </alpha></set> <button></button> |
در اینجا کد تغییر یافته ی res/menu/main.xml را مشاهده می کنید.
1 2 3 4 5 6 | <item ="" android:id="@+id/rotate360" android:orderincategory="100" android:showasaction="never" android:title="@string/rotate_String"></item> <item ="" android:id="@+id/zoomInOut" android:orderincategory="100" android:title="@string/zoom_In_Out"></item> <item ="" android:id="@+id/fadeInOut" android:orderincategory="100" android:title="@string/fade_String"></item></menu> <button></button> |
در اینجا کد تغییر یافته ی res/values/string.xml را مشاهده می کنید.
1 2 3 4 5 6 7 8 9 10 11 12 13 | <!--?xml version="1.0" encoding="utf-8" ?--><manifest xmlns:android="http://schemas.android.com/apk/res/android" ="" package="com.example.animation" android:versioncode="1" android:versionname="1.0"><uses-sdk ="" android:minsdkversion="8" android:targetsdkversion="17"></uses-sdk><application ="" android:allowbackup="true" android:icon="@drawable/ic_launcher" android:label="@string/app_name" android:theme="@style/AppTheme"><activity ="" android:name="com.example.animation.MainActivity" android:label="@string/app_name"><intent-filter><action android:name="android.intent.action.MAIN"></action><category android:name="android.intent.category.LAUNCHER"></category></intent-filter></activity></application></manifest> <button></button> |
اجازه دهید برنامه ی شما را اجرا کنیم. فرض می کنیم که دستگاه موبایل خود را به کامپیوتر متصل کرده اید. برای اجرای برنامه از Eclipse یکی از فایل های فعالیت برنامه ی خود را باز کنید و روی آیکن Run از قسمت تولبار کلیک کنید. قبل از شروع برنامه، Eclipse برای انتخاب یک گزینه پنجره ی زیر را نمایش خواهد داد که می توانید مکان اجرای برنامه ی خود را انتخاب کنید.

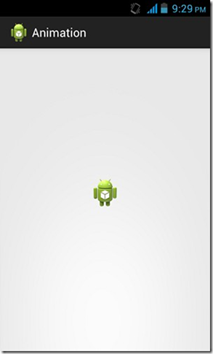
دستگاه موبایل خود را به عنوان یک گزینه انتخاب کنید و سپس آن را چک کنید و صفحه زیر را نمایش می دهد.

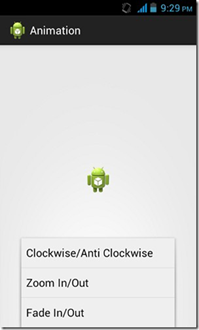
اکنون فقط منو را از موبایل خود انتخاب کنید که پس از آن منویی ظاهر خواهد شد که مانند زیر خواهد بود.

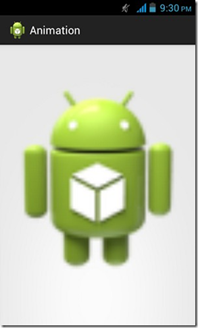
اکنون گزینه ی Zoom in، Zoom outرا انتخاب کنید که انیمیشنی ظاهر خواهد شد که چیزی شبیه این خواهد بود.

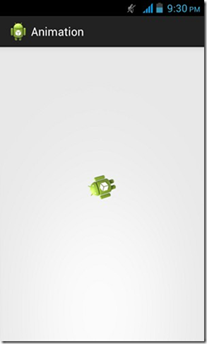
اکنون گزینه ی clockwise را از منو انتخاب کنید، انیمیشنی ظاهر خواهد شد که به این شکل خواهد بود.

اکنون گزینه ی fade in/out را از منو انتخاب کنید، انیمیشنی ظاهر خواهد شد که چیزی مانند تصویر خواهد بود.

اگر برنامه را در یک مقلد اجرا کنید، ممکن است تاثیرات یک انیمیشن خوشایند را نداشته باشید. شما باید آن را در موبایل اندروید خود اجرا کنید تا تجربه یک انیمیشن خوشایند را داشته باشید.
